In my last post I mentioned an awesome site for sharing your photos and making photobooks, greetings card, etc., Viovio.com. I have seen post before of some people saying they have trouble with loading their images to create a photobook or other Viovio publication. I thought I would do a tutorial on how to do a greeting card since I recently won second place in their Holiday Greeting Card contest. When I entered my first card I did have some difficultly figuring it out. After wards I was like "duh". It's simple if you pay full attention to what you are doing and don't try to rush through it.
The first thing you want to do is create a design for a 5x7 or 7x5 inch card. I use Photoshop so I start with a blank document at 5.25x7.25 inch to allow for printing bleed of 1/8 inch all the way around and a transparent background. The transparent background is important if you are making you card to sell so that the purchaser can upload their photo to personalize it. Then obviously you create you card design as you want it. Make sure you save your layered file in case you need to edit it. When you are finished with your card save it as either a .pdf or .png file the preserve your transparent area. Design all 4 sides of the card, ie. front, inside top, inside bottom, and back. Even if I have a blank area I still save a blank size to insure proper placement of the later after submitting the finished card. I then create a new document and place all 4 sides of the card on it for a preview.
Next you are going to login to your account at www.Viovio.com (If you don't have one, create one, its free and a way place to load your photos to share with family and friends.). Click Photo Cards tab at the top of the page. The next page will say Create a New Product and under that there are 3 links, My Products, Create New Book and Create Template. Click on Create Template. The next page will say Book Designer Templates. On the right side under Create New Template, click the green button that says Create Template. This page is pretty self explanatory but I will walk you through it so there are no issues.
1. Name your Card Template
2. Set the price of your card. This price will include 10 cards and envelopes.
3. Browse for the preview file you created (if you didn't create one, upload the front of the card).
4. Click the drop menu and choose a category where you card fits. ie. Holidays, Sports, Love, etc.
5. Under Status choose Request General Availability. This lets Viovio know you have a card ready for their approval to be published to the site for purchase by members.
6. Tags, here you can type a word(s) that will make your card easy for people to find if they do a search for a certain category. Much like the theme above.
7. Viovio tag. If you have the cards loaded to your Viovio gallery this number is loctled in the URL of this page in your gallery. I personally never fill in this option.
8. Security level, well if you want people to see it then you choose Publicly Visible.
9. Summary, again another field that will help with searches.
10. Content Format, leave this at the default Viovio has selected.
11. Write a description of your card if you want. I usually put the text of the inside of the card here so it can be read easily.
12. On the right side of the page at the top you can upload the 4 parts of the card. You load them one at a time.
13. Once you have all parts of your card loaded go to the bottom of the page and click Save.
The next page will upload your images for you card. Once loaded you will confirm the publishing of the card. Read the page and either accept or decline. Obviously your are going to accept.
The next page will give your the preview and chance to edit the card if needed. On the right top side, this is where you want to make sure that your card parts are in the right order. Otherwise they will not print in order when someone purchases the card. This will make for a very unhappy customer and you don't want that. Simply click the Arrange Pages button and drag the card parts to the current position. Go to the bottom of the page and click save. You will get the accept page again and then the edit page but no need to go through that page again. Click the My Project tab at the top of the page and you will see your card listed. It will not show available yet. You will receive and e-mail from Viovio once it is approved and loaded to the store front.
Happy Card Creating!
Wednesday, January 19, 2011
Tuesday, December 7, 2010
Been Awhile
Hello everyone. Sorry it has been so long since my last post. It has been a very busy year. I would to pop in and say Merry Christmas and Happy New Year to you all.
I also wanted to give a mention to you for Holiday cards and gifts of Photobooks or even a book after the Holidays to keep your memories alive. I love the products from Viovio. I have had several books printed over the years from several sites and have always gone back to Viovio for the excellent quality of their photobooks. Their book designer software is very easy to use or you can load you own completed pages.
Visit them today at www.Viovio.com
Wednesday, July 8, 2009
Want to WIN a new lens for you SLR Camera???
A friend had this contest for a free camera lens from Tamron contest on her blog. I am passing on the opportunity to you.
WIN A SLR LENS FROM TAMRON
Good luck to you but mostly, good luck to me. lol
WIN A SLR LENS FROM TAMRON
Good luck to you but mostly, good luck to me. lol
Saturday, June 6, 2009
Nice Summer Kit
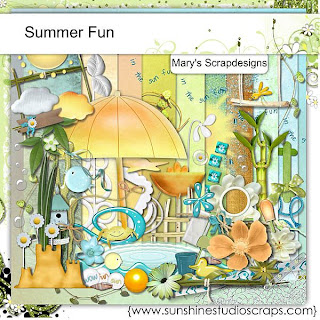
Poking around Sunshine Studio Scraps today I came across this kt called Summer Fun from Mary's Scrapdesigns. I thought I would share it here.

Check it out. I have been getting their newsletter for sometime but never really looked around their site before today. I will be going back a lot.
I am so far behind on fixing my blog and I apologize. I know I keep saying this, but I hope to get it caught up this month.

Check it out. I have been getting their newsletter for sometime but never really looked around their site before today. I will be going back a lot.
I am so far behind on fixing my blog and I apologize. I know I keep saying this, but I hope to get it caught up this month.
Monday, April 20, 2009
ARGH
Hopefully soon I will get back to this. My hard drive crashed and I lost everything. Luckily I have all my kits on my external hard drive but my layouts were on my hard drive because my EHD is full. I had ordered a new one but it was on back order. GO figure. I have now purchased a new one and hope to be able to redo some of the layout I lost.
Sunday, March 29, 2009
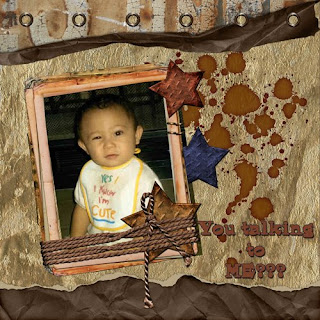
Are You Talkin' to Me?
This page is my great nephew, Zack. Better know as "Beast". Page was done using the Rough and Tumble Reloaded kit by Flergs at Scrapbook Graphics. The stars and frame elements are not part of this kit.
ROUGH AND TUMBLE RELOADED

The LO is done with a template I did (somewhat mocking the LO posted with the kit on SG) for Tuesday Template Tag on the Photoshop Creative Elements forum.
ROUGH AND TUMBLE RELOADED

The LO is done with a template I did (somewhat mocking the LO posted with the kit on SG) for Tuesday Template Tag on the Photoshop Creative Elements forum.
Subscribe to:
Posts (Atom)


